Unexpected bags in the crafting area

Unfinished business and incomplete checkouts

A curtain, a sewing machine, and eight well-meaning produce bags walk into a supermarket…

The bags that started it all

Not to be dramatic, but y-e-a-r-s ago I made a batch of cinch-and-roll produce bags—back when that pattern was still free. I loved them. They had a cute little flower print and loops to close them up. But then self-checkouts happened.

At first, you could avoid them if you wanted to. But now? Waiting in the queue for a human checkout just isn’t how I want to spend my time, though, to be fair, my imagination does keep me company wherever I am.

Then came the cameras. Instead of just selecting your veg and being believed, there were little surveillance thingies watching your every apple. Honestly, it feels like the whole system is set up to nudge you back toward using single-use plastic bags—which are still available where I live.

Plans, plots and paranoia

For a while, I’ll admit, I was bitter. My cute little bags sat unused. I daydreamed about making new and even cuter ones—with drawstring ribbon, black floral binding and those handy handles. But then I remembered the cameras. Anything with high contrast or “unusual” details might trigger the system. So I did nothing.

Until I couldn’t take it anymore.

Mass production without testing

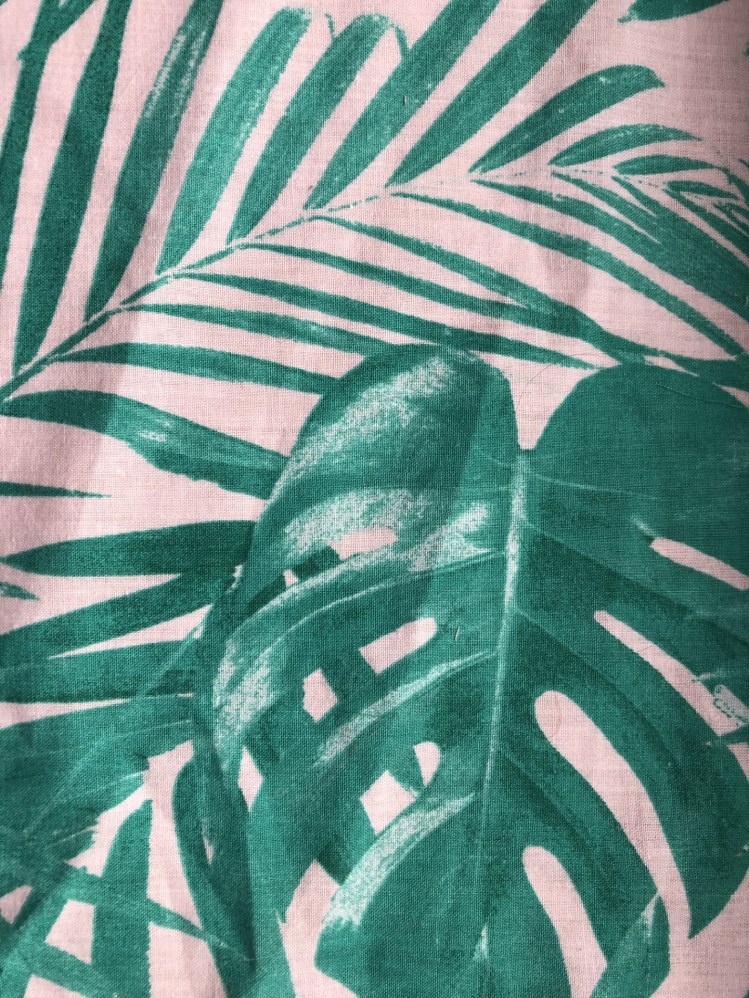
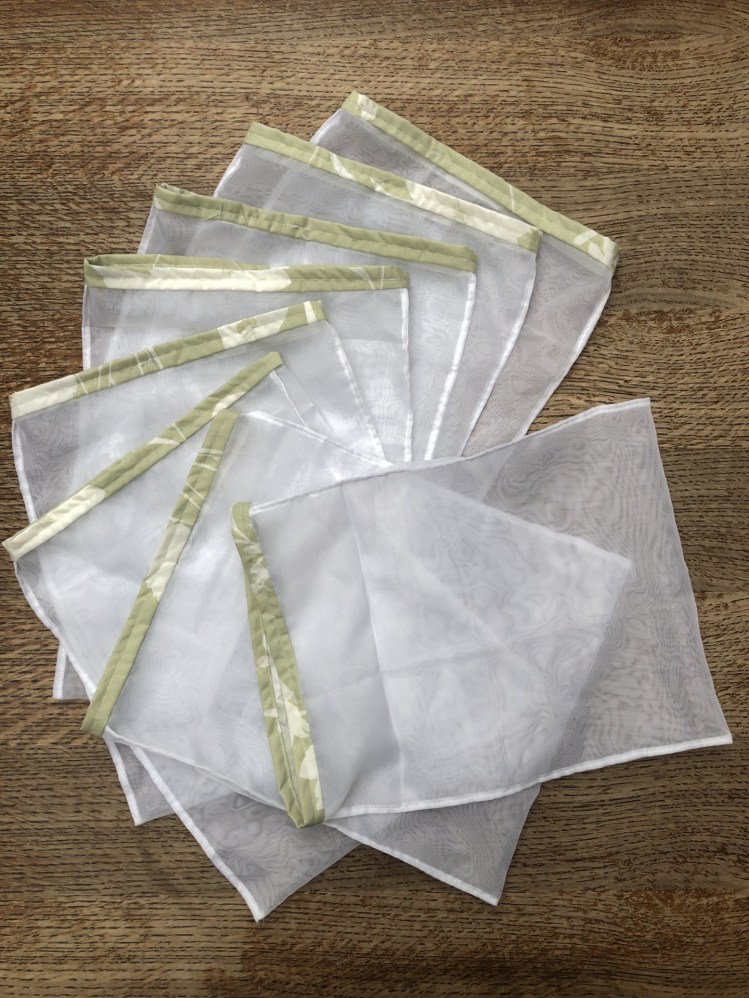
I reached a point where reusing those scrappy single-use plastic bags just felt wrong. So I grabbed a voile curtain, chopped it up into chunks, serged the sides, turned the bags inside out and stitched over the seams for extra strength. I bound the top edges. No bias cutting, no pre-ironing the binding strips, no handles, no drawstring. Just simple bags.

Of course, I just blazed ahead and made eight in one go without pausing to test whether they’d freak out the machines.

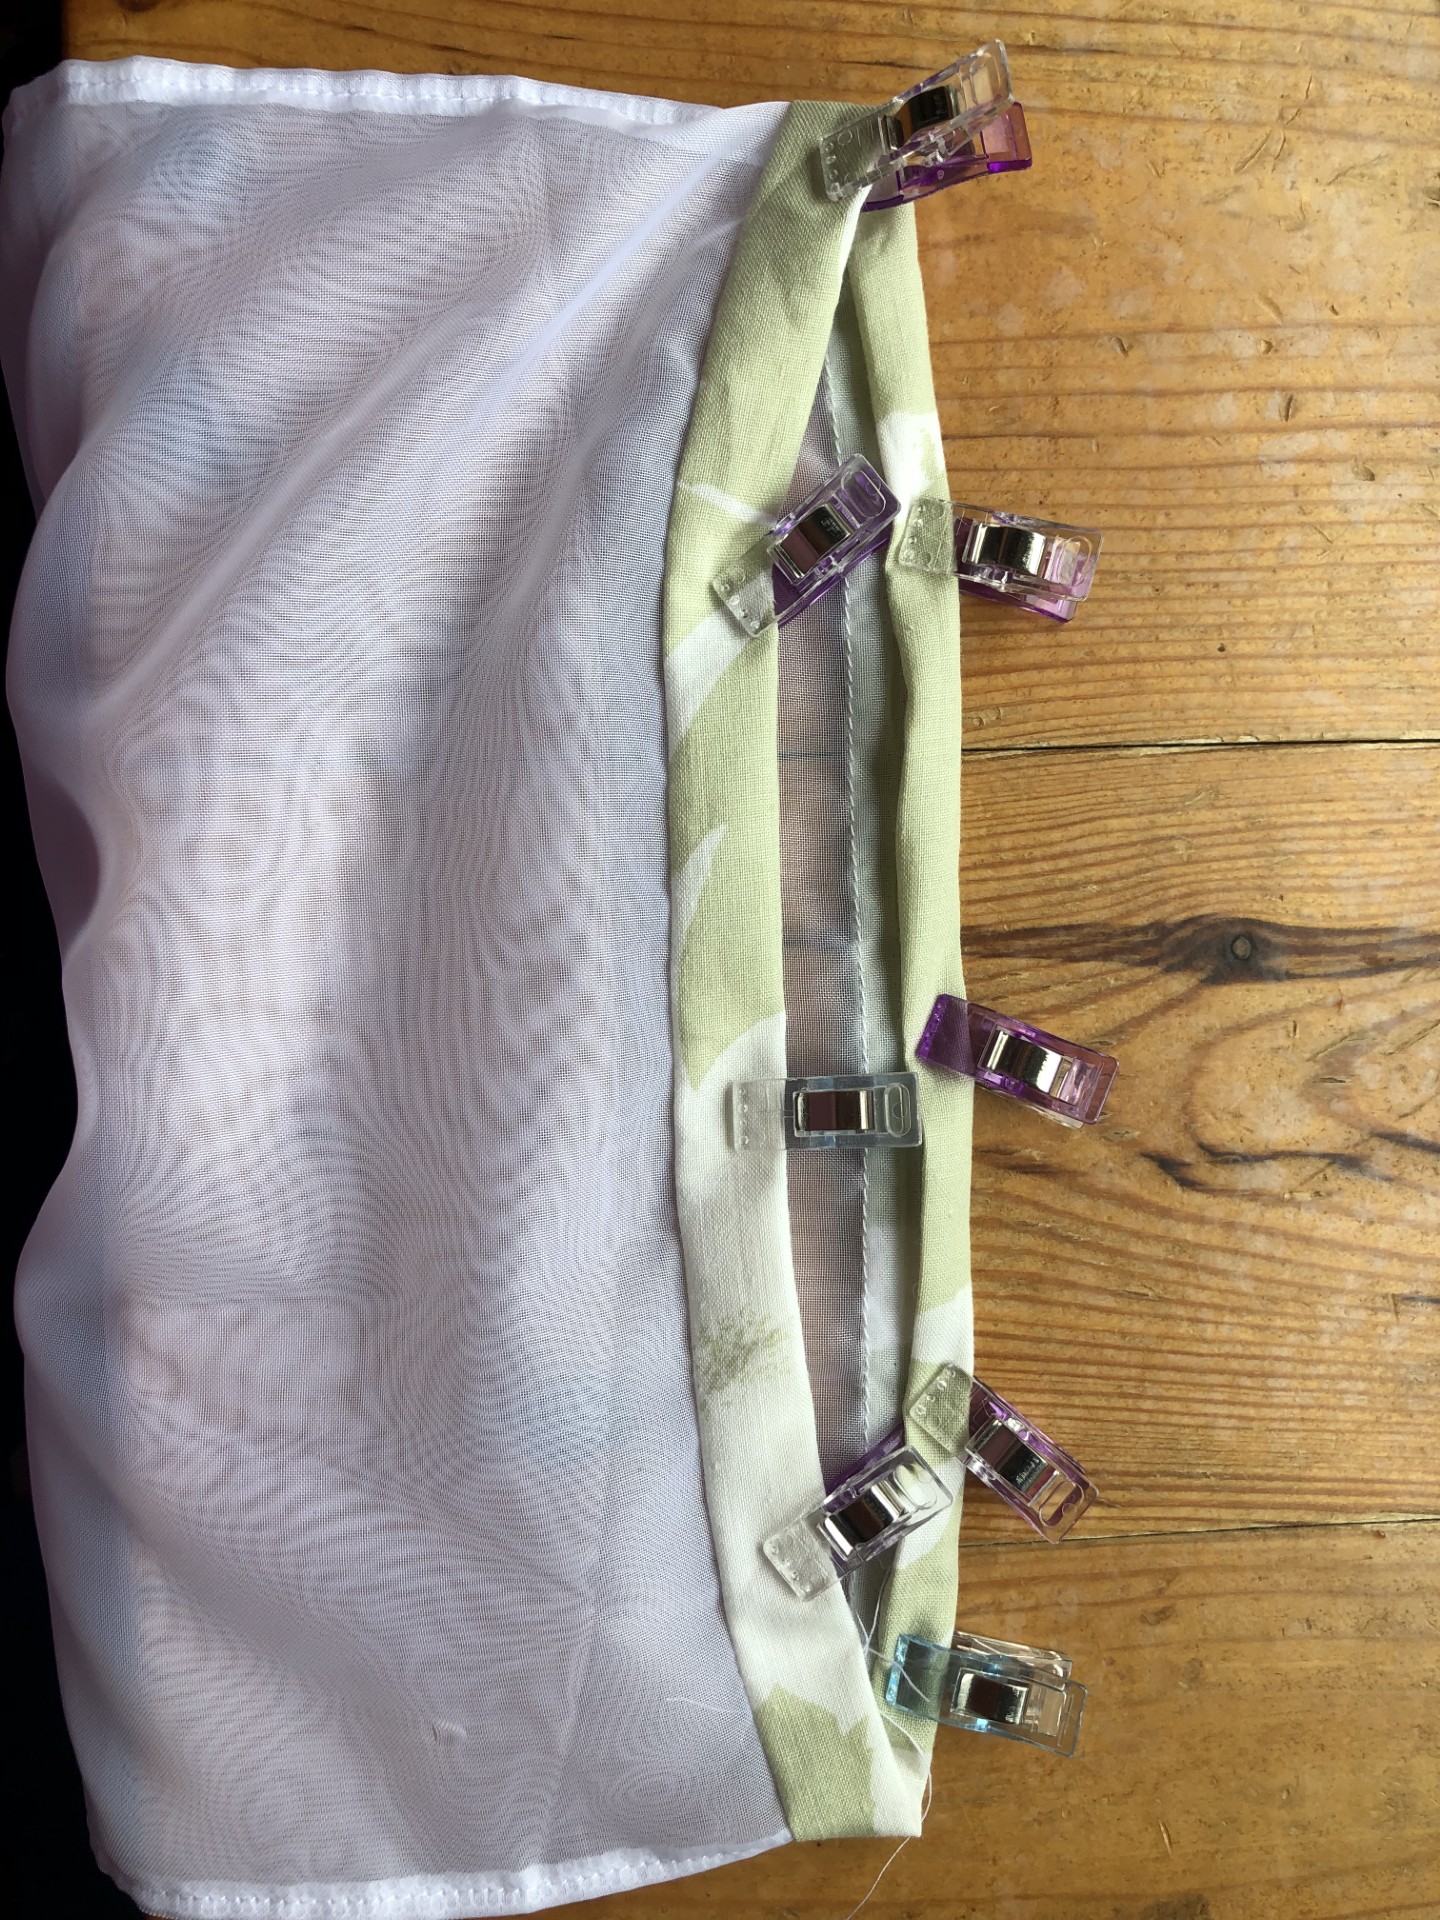
Each bag is roughly 33cm deep and 25cm across (about 50cm around). I avoided adding anything extra that might attract the camera’s attention and used a leftover piece of pale green sheet for the binding—low contrast and hopefully less suspicious.

Did they work?

No, they bloody well didn’t. And it had all been going so well—right up until the last hurdle.

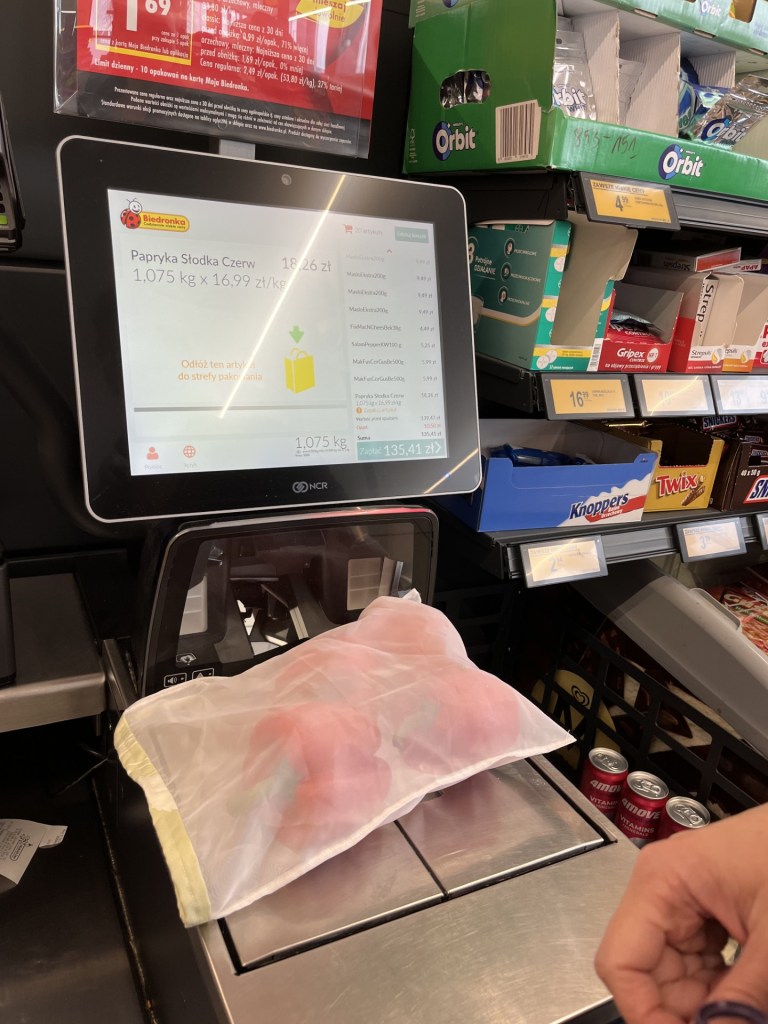
  • I proudly (though hesitantly) chose to test them with red peppers. I figured if anything stood a chance of being recognised through the fabric, it would be a big, bold red pepper.
  • The bags are roomy enough that, as long as you don’t stuff them to the brim, the lack of a drawstring or handles isn’t an issue.
  • The checkout did recognise the red and even suggested the correct options—promising!
  • I tapped the screen, watched as the “weighing” and “move item to bagging area” prompts appeared…
  • I moved the bag over and—bam! A blurry image popped up with the dreaded message: “unexpected item in the bagging area.”
  • Luckily, an employee was right there and cheerfully said, “I’ll rescue you!” (in Polish). And you know what? She actually did rescue the situation. That short, friendly exchange meant I left with a smile rather than a meltdown.

The moral of the story?

Don’t make eight bags before you’ve tested one.
Maybe try shopping somewhere that isn’t set up to push single-use plastic at every turn.
And maybe, just maybe, not everyone working in Biedronka has lost the will to live.

If you still want to make a similar bag—maybe using a different fabric if your checkout has eyes—here you go.

Basic Produce Bags – Sewing Steps

Here’s how I made mine. They’re intentionally simple and fast. You can adjust the size or finish details to suit your own setup.

  1. Cut your fabric.
    Either divide your fabric equally with no waste, or cut strips roughly 66cm x 25cm if you like the size of mine.
  2. Fold each strip in half lengthwise, right sides together.
  3. Sew the side seams.
    Use a serger or a zigzag stitch to secure both long edges.
  4. Turn the bag right side out.
  5. Reinforce the seams.
    Sew down each side again, stitching through both layers of fabric and the seam allowance. This adds strength and stops the seam from pulling apart under weight.
  6. Prepare the binding.
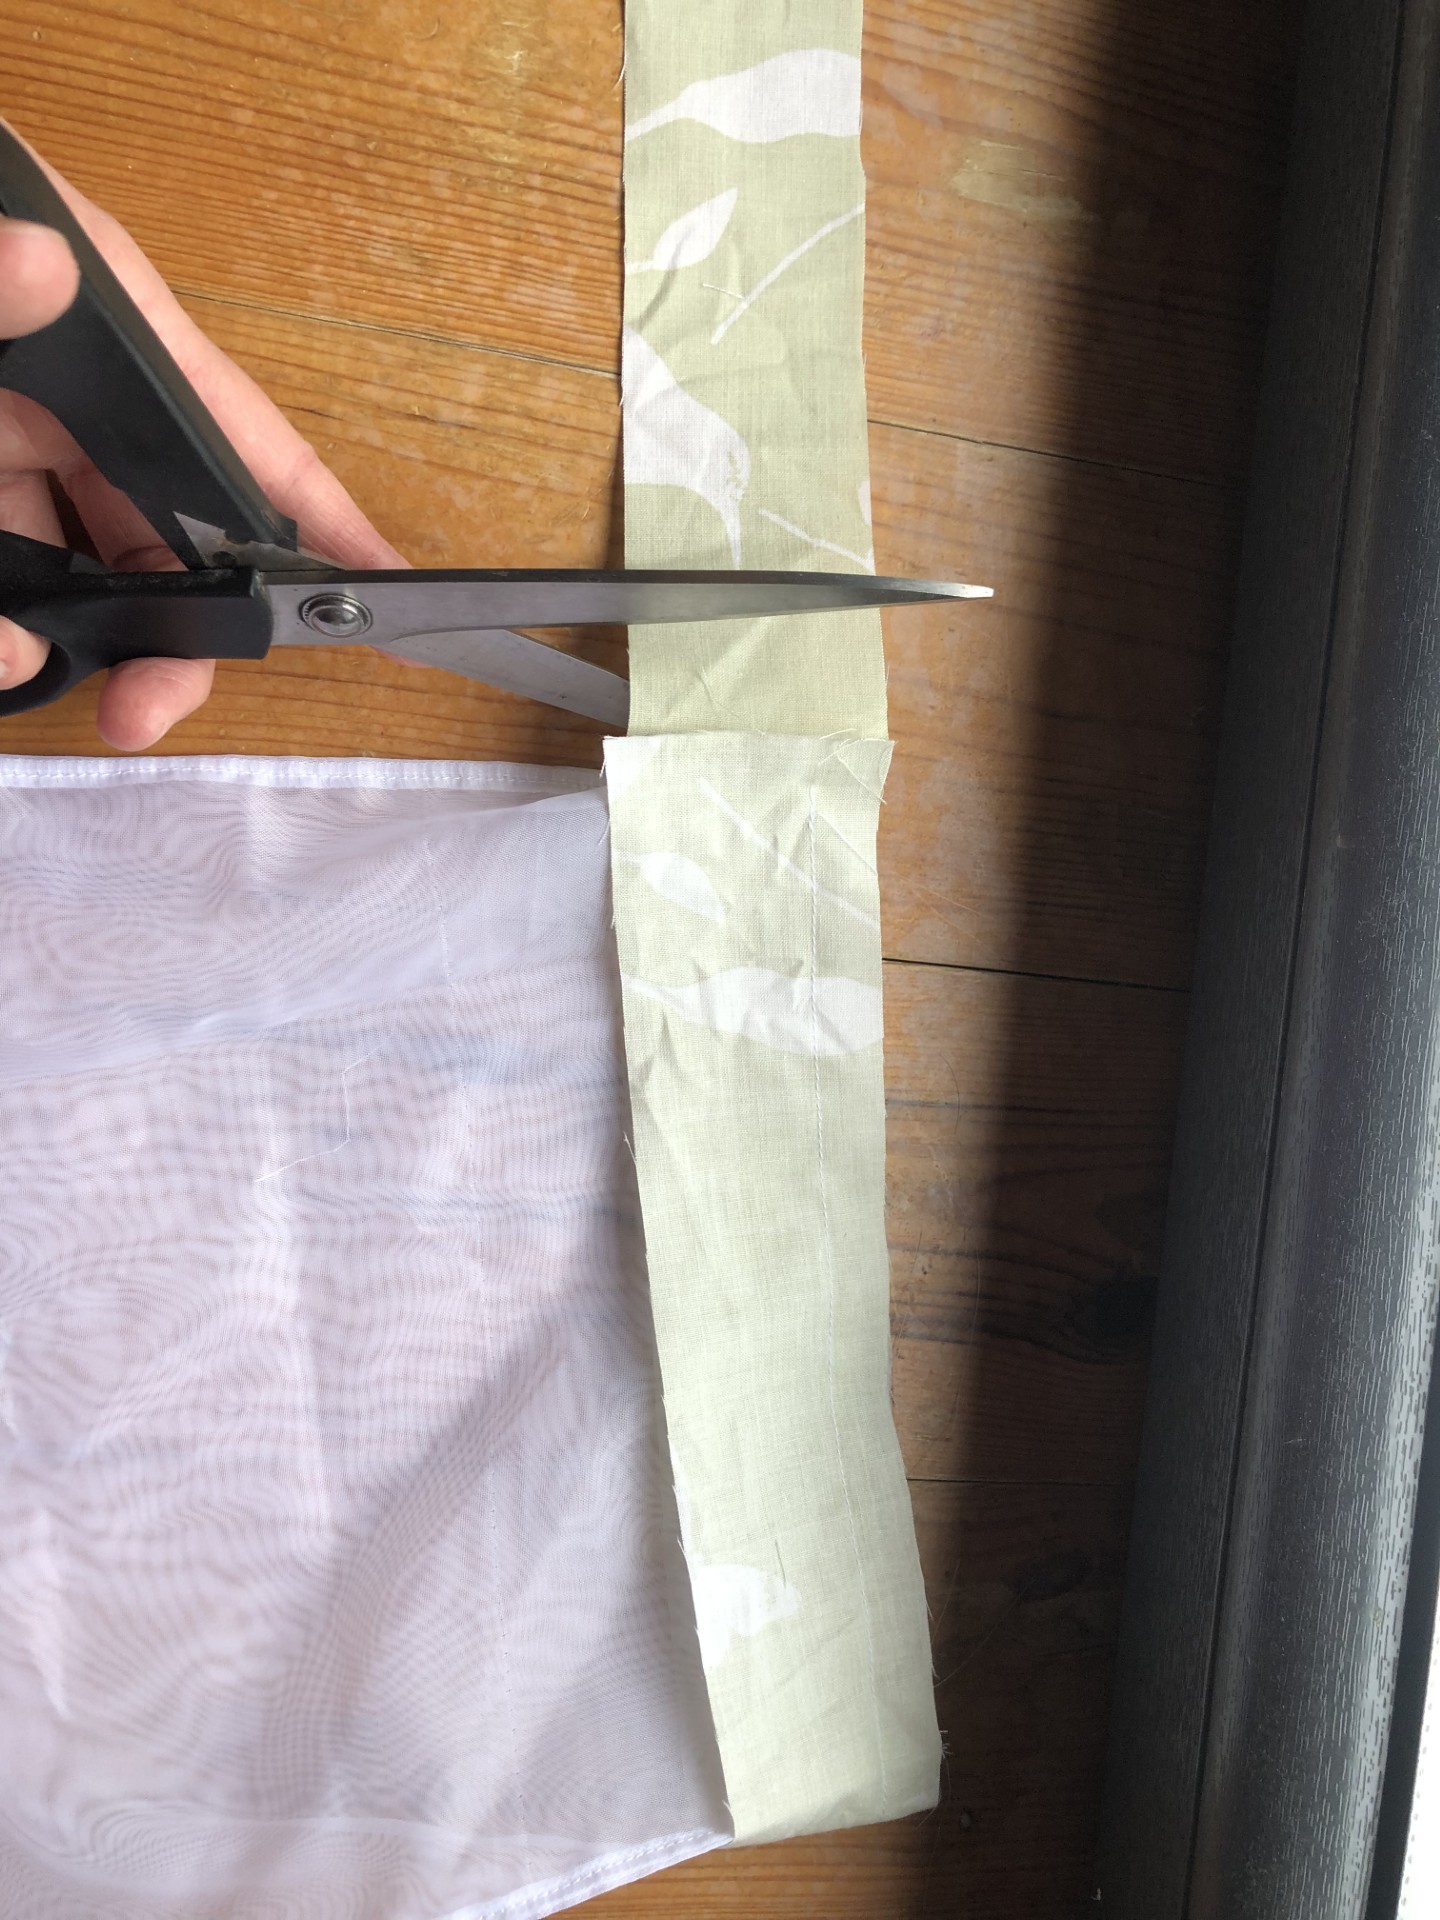
    Cut strips at least 5cm (2 inches) wide. These don’t have to be bias strips since it’s a straight edge.
  7. Attach the binding.
    • With right sides together, line up the binding along the top edge of the bag.
    • Don’t start exactly on a side seam AND start sewing about 1–2cm from the edge of the binding strip.
    • Sew all the way around using a 1.5cm (5/8 inch) seam allowance. I didn’t mind that this made the inside edge narrower than the outside.
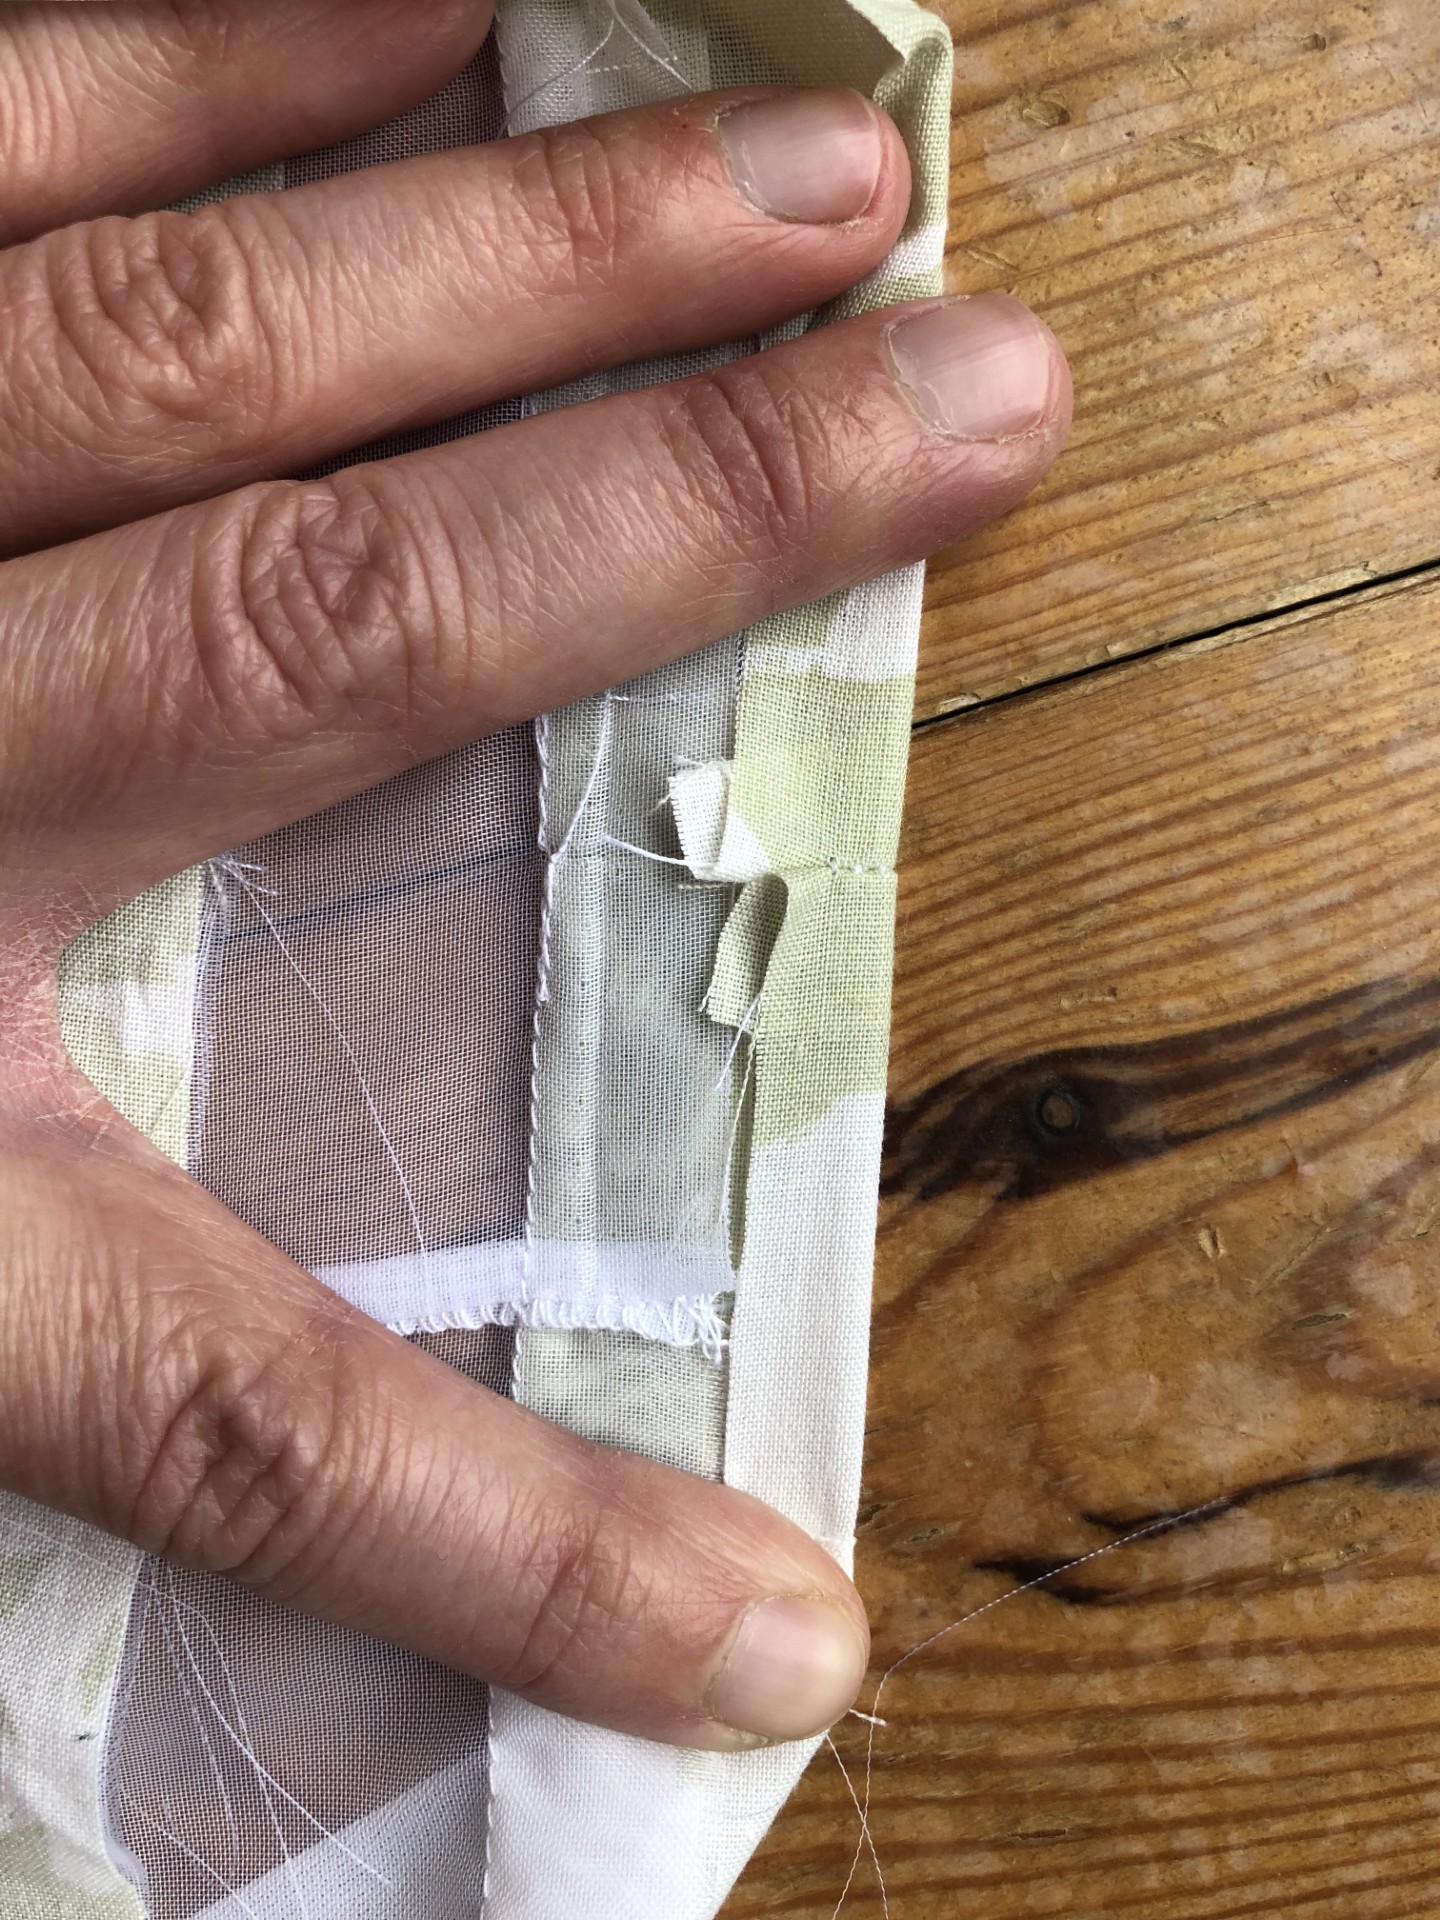
  8. Join the binding ends.
    Trim the strip so you have about 1cm extra on each end. Sew the two ends together without catching the bag in the seam.
  9. Enclose the raw edges.
    • Open the seam where you joined the binding ends so it lies flat.
    • Fold the binding upwards so it extends beyond the top of the bag.
    • Then fold the outer edge of the binding down so its raw edge meets the raw edge of the bag.
    • Fold the whole thing down again so everything is enclosed.
  10. Topstitch the binding.
    With the inside of the bag facing up (so you can see what you’re doing), topstitch along the edge of the binding.

That’s it! I may now quietly mourn the fact that I didn’t use that black floral print binding—or add handles.

Moomins and compromises: A Nova coat tale

Why did I sew the Nova coat?

I love layers, and while fitted clothes suit me better most of the time, I needed something looser as a top layer — roomy enough to go over a vest top, jumper and whatever else I’ve thrown on that day. Most sewists will recognise the Nova coat by Papercut patterns (originally released as the Sapporo) and its cocoon shape and design lines called to me.

I’d had the pattern printed, taped, and traced for… months? Possibly a year. I was just waiting for the right fabric to inspire me to actually sew it. Until then, it sat there patiently.

General Nova coat notes

My measurements:

  • Bust: 98 cm
  • Waist: 82 cm
  • Hips: 108 cm

Size cut:
Although my measurements average out to a size 5, I cut a size 3 based on pattern reviews — and I’m glad I did. It’s still roomy enough to layer underneath without overwhelming my frame.

Pattern tip:
The back is made of three pieces:

  • Centre back
  • Two upper side backs (“shoulders”)

With a ‘feature fabric’, it’s very easy to overlap the pattern pieces and cut the back as a single piece. For a solid fabric, I always keep the pieced back – the design lines are just too lovely to skip.

Nova 1: The Moomin fabric quest

On one of my foraging trips to the second-hand shop, I spotted a single solitary Moomin comic strip curtain. Immediately, I thought: Nova coat. But then, budget panic and general second-guessing kicked in: Was it enough fabric? Was I being impractical?

I walked away. But that curtain haunted me.

A few days later, I cracked and asked my husband to grab it if it was still there. Apparently, he marched into the shop and declared (in Polish), “I’m here for the Moomin curtain for my wife.” The woman behind the counter knew exactly what he meant.

He came home, windows down, honking the horn, with the curtain draped around his neck like a vintage racing scarf.

And thus, the first Nova was born.

Sewing the Moomin coat

  • The curtain was big enough for the long coat version (phew).
  • To show off the large-scale print, I combined the back and shoulder pieces into one.
  • The sleeves are one piece, so the comic runs upside-down on the back — but since I’m not holding my arms out like a scarecrow all day, no big deal.
  • I lined it with assorted black and white fleece, left over from other projects. This made the lining a bit thicker than the outer — but it still hangs well.
  • The curtain had a loose weave, so I added (perhaps overly dramatic) triple topstitching at stress points.

I wear this coat constantly, and my husband now rolls his eyes and mutters, “Here comes Moomin Mama”. I’ll take that as a compliment, thank you.

Nova 2: The undercover poncho project

My daughter had two oversized second-hand ponchos that she wore on chilly days. But carrying a bag in them was awkward, and one had a neck clasp that nearly strangled her.

With all the subtlety of a mother on a mission, I decided to use them to make her a house coat. She was uncertain. I forged ahead anyway.

Luckily — she loves it. Just like I live in my Moomin coat, she now lives in her Nova.

Sewing the poncho coat

This one came with challenges:

  • Both ponchos had very loose weaves and frayed easily.
  • The seam allowance is only 1 cm, which isn’t much room for fancy finishes.
  • Midway through construction, I panicked that it would all unravel.

My solution? I cut strips of fabric from an old sheet and used them like twill tape to reinforce every seam where the two ponchos met. It added sewing time, but strengthened the seams and helped manage the fray.

No visual proof these strips do the job (all seams are hidden), but the coat is still intact — so I’m counting that as a win.

Nova 3: The compromise coat

My mum gifted me a piece of dark purple coat-weight fabric — but there wasn’t enough for even the short version. I considered pairing it with minty blue-green wool for a “choc-chip” look, but a pile of old jeans in the corner caught my eye and imagination.

Enter: hexagons.

I patchworked enough denim hexagons to use on the bottom front and back of the coat, so the patchwork sections meet and visually wrap around the sides. I love the way the patchwork sections look… but this coat turned into a series of sewing compromises.

Sewing the compromise coat

  • Short coat version — it’s all I had fabric for.
  • Skipped patchworking the drafted-on pocket bag. Instead, I just sewed a chunk of denim just inside where the folded edge sits.
  • Didn’t want to fold patchwork edges, so I made custom facings for the:
    • Centre front
    • Bottom front and back edges
      Worked well — except the lower front corners, which needed some hammering to lie flat.
  • Patchwork back was too short in places because I ran out of matching denim — I was missing about 1 cm, but I went for it anyway.
  • No backing layer on the hexagons. I was already concerned about the denim weighing down and stretching the purple fabric.
  • Used a slippery lining fabric but had previously cut into it, so both inside fronts have a mystery seam halfway down.
  • The neck facing is black fleece — because the purple fabric is gorgeous but itchy, and I know myself.
  • Finally, that slightly-too-short outer back? Yeah, it messed with the lining too. It now bags slightly past the hem.
    • I tried edge stitching the hem but it just created a hard ridge, so I unpicked it. I’ll tack the lining in place eventually.

Final thoughts

The Nova coat is a fantastic pattern — striking but wearable, and endlessly adaptable.

  • The Moomin coat is my winter uniform.
  • The poncho coat gets daily wear from my daughter.
  • The compromise coat… we’re still working on our relationship. I finished it right as spring arrived, so we haven’t had time to bond. But come colder weather, I’ll take it out for a walk around town and see if we can find common ground.

The Ogden Metamorphic mash-up

Photo of a tropical print house dress

A trio of house dresses

The quest for the perfect “house dress” ends here (with second-hand duvet covers, of course).

For a long time, I’ve wanted something easy to wear and easy to wash for those days spent buzzing around the house and out on the property. Something cute enough to feel put together, comfy enough to handle chores, and quick to sew so I can make a few in different colours. Basically, the ultimate house dress.

But I can be a little hard to please when it comes to clothes.

My (extensive) house dress wishlist:

  • Made from woven fabric, preferably second-hand
  • V-neck or mid-to-low scoop neckline
  • Sleeveless — spaghetti or narrow straps ideal
  • Covers me when I bend over but sits above the knees (flattering, thanks!)
  • Lower waistline and loose, but not oversized — I want to be comfy, not swamped.

See, picky!

After far too much procrastinating (read: “research”), I gave up searching for the perfect pattern and started playing with the ones I already had. And somehow, miraculously, I hit the jackpot on the first try with a combo of the True Bias Ogden Cami and the Sew Liberated Metamorphic Dress.

Two days later, I had three comfy, swishy, house-friendly dresses made from old duvet covers — they beat a faded T-shirt and stretched-out leggings any day.

Patterns, sizing and alterations

My measurements:

  • Bust: 98 cm
  • Waist: 82 cm
  • Hips: 108 cm

Ogden Cami – True Bias

Size traced: 12
Modifications:

  • Adjusted side seams to drop straight down from the widest bust point (removed flare).
  • Shortened both front and back by 4″ — I removed the height from the middle of the pattern to keep the hem curve intact.
    • I’d made an Ogden before and knew that shortening by 4″ would place the hem right at my hip bone, where I wanted the waist seam to hit.
  • Cut two fronts and two backs to fully line the bodice.
    • A full lining gives a cleaner finish — plus, on very relaxed days, I can skip the bra.

Metamorphic Dress – Sew Liberated

Size traced: 16
(I wanted wiggle room — the extra gathers blend in nicely.)

Skirt construction:

  • I didn’t want the reversible/double-layer skirt, so I simplified:
    • Back of the skirt: One underskirt piece — covers my bum.
    • Front of the skirt: One overskirt piece — slightly shorter to show more leg.
    • Bonus: It helps differentiate the front from the back since Ogden can be a little ambiguous!

Sewing notes

Ogden Cami (Bodice)

  • Follow the usual instructions (seam allowance is ½”).
  • Only changes:
    • Attach a full lining instead of the partial one.
    • Skip hemming the bottom — the skirt gets attached here.

Metamorphic Skirt

  • Seam allowance is ⅝”, so I used rough flat-felled seams on the sides (I hate raw edges).
  • Hemming:
    • Sew a ¼” guideline, then double-fold and topstitch the hem.
    • I carefully pinned the curved front, but totally winged it on the back.

Joining bodice and skirt

  • Gather the skirt:
    • Single line of basting stitches across both front and back.
    • (Yes, two rows are better — but hey, house dress = relaxed standards.)
  • Attach the outer bodice:
    • Right sides together, sew the gathered skirt to the outer bodice with a ⅝” seam.
  • Prep the lining / inner bodice:
    • Sew a ⅝” guideline along the inner bodice edge.
  • Pin, pinch, and peek
    My personal, slightly fiddly, but satisfying technique:
    • With the dress inside out and flat, pin the inner bodice over the waist seam.
    • Flip to the right side of the dress, pins underneath.
    • Topstitch slowly:
      • Pull a pin → pinch the lining in place → peek underneath to check it’s sitting right → sew a few stitches.
    • Repeat. Slowly.

This method helps ensure the outer seam stays flat and neat — and avoids those irritating finishing mistakes I know I’d fixate on every time I wore the dress.

Conclusion

That’s it! I’m actually wearing the pink version as I type this. It’s already a firm favourite, but in need of a wash, so it’s time for the orange or tropical print dress to tag in.

Those of you with sharp eyes may have spotted one oversight… no pockets! I’m toying with the idea of adding patch pockets for my phone — but honestly, walking around without it might not be the worst thing.